A guide to using the Single-Image and Multi-Image print templates.
Button Down the Hatches offers two print templates for creating pinback button artwork:
Both tools run entirely in your browser. Your images are never uploaded to a server.
The Single-Image and Multi-Image templates require a license key. After purchasing, you will receive a key by email.
To use the tools on a new device, enter the same key from your purchase email.
Tip: Your key works on any browser, any device, unlimited times.
The Single-Image Template fills every slot on the print sheet with the same image. You choose the button size, upload a photo, position it, and print.
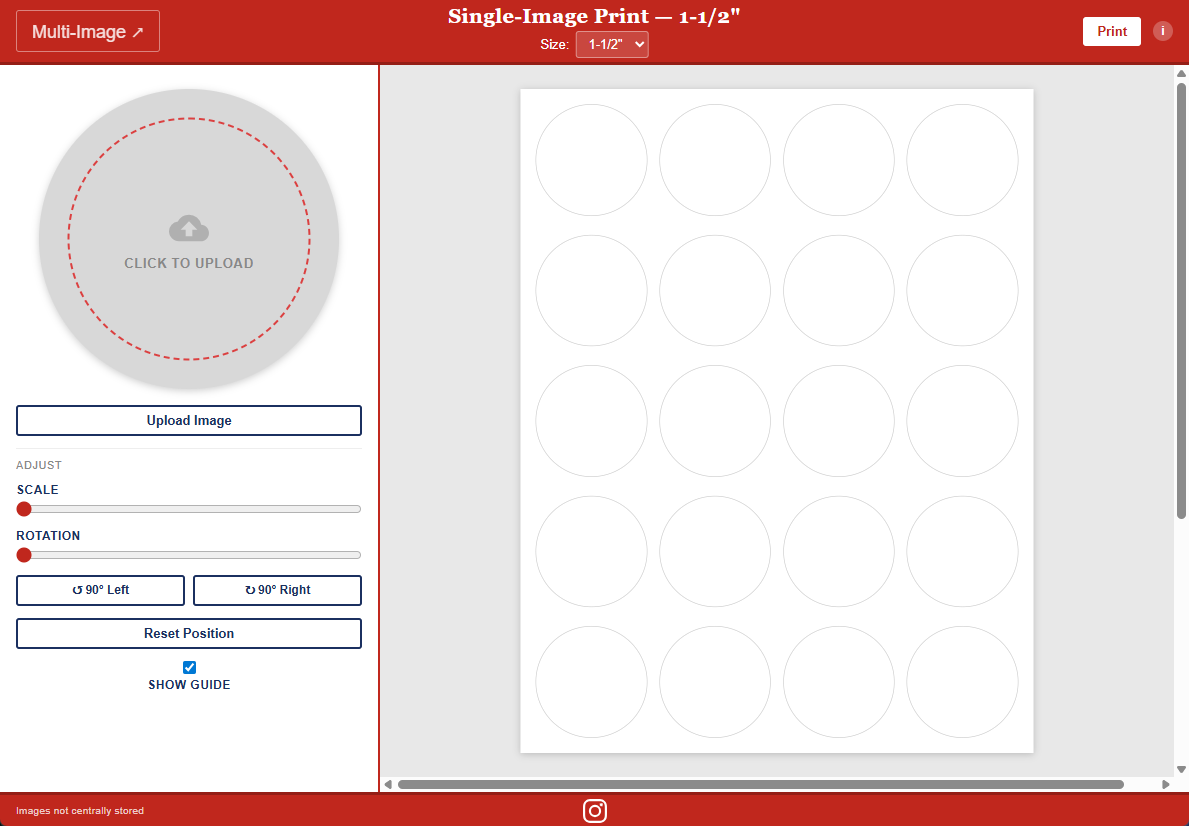
| Control | What it does |
|---|---|
| Multi-Image ↗ | Switches to the Multi-Image Template |
| Size selector | Changes the button diameter. Choose from 7/8" through 6". The grid updates immediately to show the correct number and size of circles for that diameter. |
| Opens the browser print dialog. See Print Settings below. | |
| i | Shows a reminder of the recommended print settings. |
Click Upload Image to open your file browser and select a photo. You can also click directly on the circular preview at the top of the sidebar.
Once uploaded, the image appears in all circles on the sheet immediately.
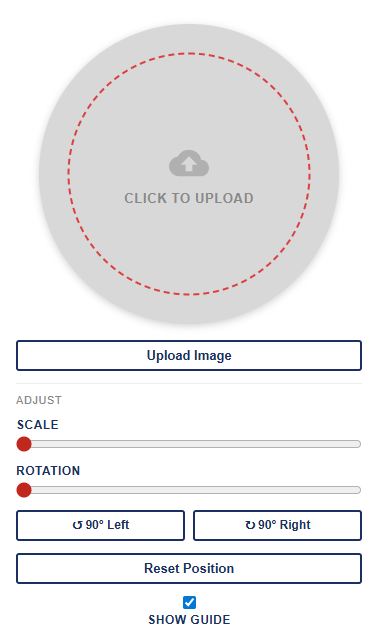
| Control | What it does |
|---|---|
| Scale slider | Zooms the image in or out within the circle. Drag right to zoom in, left to zoom out. Range: 100%–500%. |
| Rotation slider | Rotates the image. Drag to any angle from 0° to 360°. |
| ↺ 90° Left | Rotates the image 90° counterclockwise in one step. |
| ↻ 90° Right | Rotates the image 90° clockwise in one step. |
| Reset Position | Returns the image to its original position, scale, and rotation. |
You can also click and drag directly on the circle preview to pan the image.
| Control | What it does |
|---|---|
| Show Guide | Toggles a dotted ring that marks the edge of the button circle. Useful for checking that important parts of your image are safely inside the cut line. The guide does not appear on the printed sheet. |
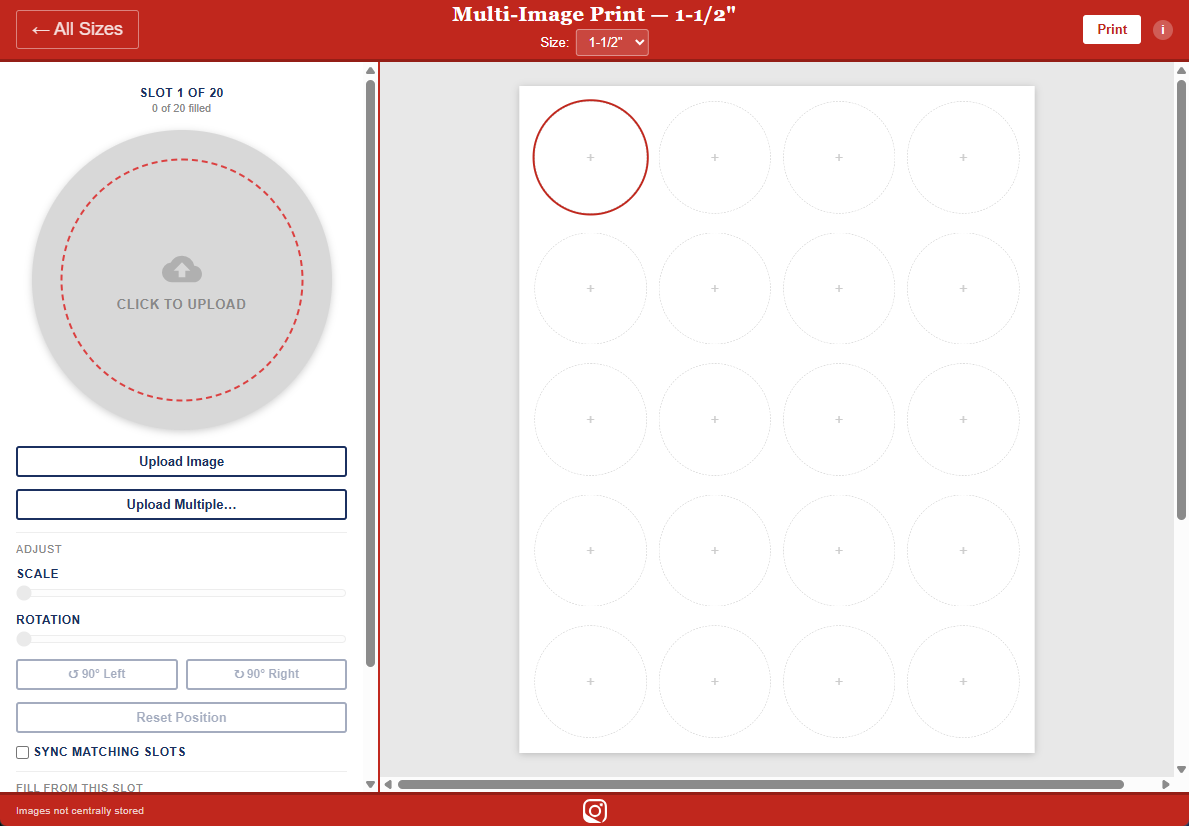
The Multi-Image Template lets you assign a different photo to each slot on the print sheet. You work one slot at a time. Clicking a slot makes it active, then uploading or adjusting affects only that slot.
| Control | What it does |
|---|---|
| ← All Sizes | Switches to the Single-Image Template |
| Size selector | Changes the button diameter. The grid rebuilds to show the correct slots for that size. |
| Opens the browser print dialog. See Print Settings below. | |
| i | Shows a reminder of the recommended print settings. |
The right side of the page shows the print grid. Each circle is a slot.
+ iconClick any slot to make it active. The sidebar switches to show that slot's image and controls.
At the top of the sidebar, two labels show your current progress:
| Control | What it does |
|---|---|
| Upload Image | Uploads one image to the active slot. After uploading, the active slot automatically advances to the next empty slot. |
| Upload Multiple… | Opens a multi-file picker. Images fill slots starting from the active slot, moving forward in row order. Extra images beyond the last slot are ignored. |
You can also click the circular preview at the top of the sidebar to upload to the active slot.
These controls affect only the active slot.
| Control | What it does |
|---|---|
| Scale slider | Zooms the image in or out within the circle. Range: 100%–500%. |
| Rotation slider | Rotates the image from 0° to 360°. |
| ↺ 90° Left | Rotates the image 90° counterclockwise in one step. |
| ↻ 90° Right | Rotates the image 90° clockwise in one step. |
| Reset Position | Returns the active slot's image to its original position, scale, and rotation. |
You can also click and drag on the circle preview to pan the image. All adjustment controls are disabled when the active slot is empty.
| Control | What it does |
|---|---|
| Sync Matching Slots | When checked, any pan, scale, or rotation change you make is automatically applied to every other slot that contains the same image. Useful when you've uploaded the same photo to multiple slots and want them all to look identical. Off by default. |
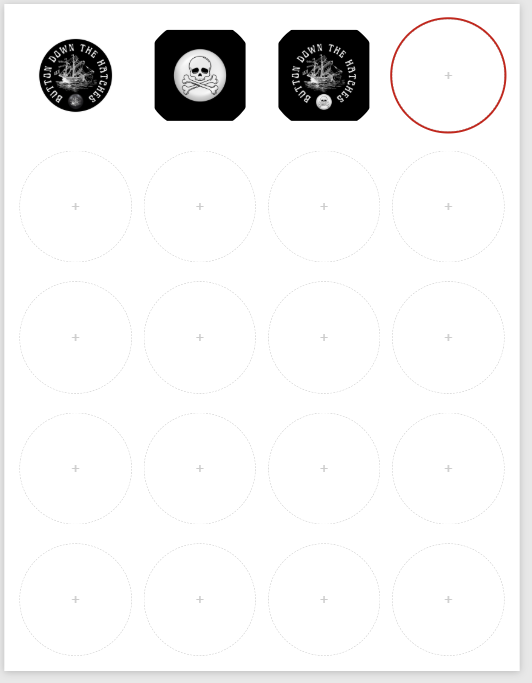
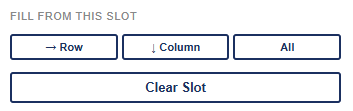
These buttons copy the active slot's image and positioning to other slots.
| Control | What it does |
|---|---|
| → Row | Copies the active slot to every other slot in the same row. |
| ↓ Column | Copies the active slot to every other slot in the same column. |
| All | Copies the active slot to every empty slot on the sheet. Slots that already have an image are not overwritten. |
| Clear Slot | Removes the image from the active slot, returning it to empty. |
| Control | What it does |
|---|---|
| Show Guide | Toggles a dotted ring on the active slot's preview marking the edge of the button circle. The guide does not appear on the printed sheet. |
When you click Print, use these settings in the browser print dialog for accurate results:
| Setting | Value |
|---|---|
| Paper size | Letter |
| Orientation | Portrait |
| Scale | 100% |
| Margins | None |
| Background graphics | On |
Important: If margins are not set to None, or scale is not 100%, the circles will not match your button maker's die size.